

Full Size Jeep Fuel Gauge Fix (1973–1985)
If your FSJ’s fuel gauge reads wrong or costs too much to replace, this Full Size Jeep fuel gauge fix shows how to repurpose the factory oil-pressure gauge into a spot-on fuel gauge. The oil and fuel gauges share the same internal movement—swap the face, wire it on the bench, and make two tiny adjustments so ½ tank = ~23 Ω. This guide covers the safe way to remove the thin aluminum face, how to bench-test with a 12-volt source, and how to calibrate for accurate readings on 1973–1985 Full-Size Jeeps.
What You’ll Learn
In this walkthrough you’ll see why the fuel and oil gauges are twins inside, the right way to swap the faceplate without kinking it, and how to bench-test with a multimeter and potentiometer so your readings match the sender. You’ll also learn a money saver: the 1974–1975 gauge works in 1976–1991 clusters—buy the cheaper early unit, swap the fuel face (or overlay), and calibrate.
Quick Summary
Functionally, an FSJ oil gauge becomes a fuel gauge once you change the face. If you run it without calibration, it may read slightly low at half. To make it perfect, set your potentiometer to about 23 ohms (the FSJ half-tank point) and nudge the two small internal tabs—one gets a gentle pull, the other a gentle push—until the needle lands exactly on ½. Using the earlier, less-expensive gauge plus a face swap is the fastest low-cost fix.
Tools & Supplies
You’ll need a steady 12 V power source (battery or power supply), a Power Probe (or simple leads) for power/ground, a small potentiometer as your adjustable sender stand-in, and a multimeter set to resistance (Ω). For the face, a 90° pick and a tiny micro pry tool let you work around the crimp slowly; a flat tool helps flatten any small kinks. A tiny dab of dielectric grease after cleanup can help keep moisture away from the windings.
Year/Part Interchange & Cost-Saving Tip
The 1974–1975 and 1976–1991 gauges behave the same electrically, which is why this swap works. If you’re watching budget, grab the 74–75 gauge, move your fuel faceplate (or add a sticker overlay), and calibrate. You’ll end up with a fully functional fuel gauge in a later cluster for less.
The Full Size Jeep Fuel Gauge Fix: Step-By-Step
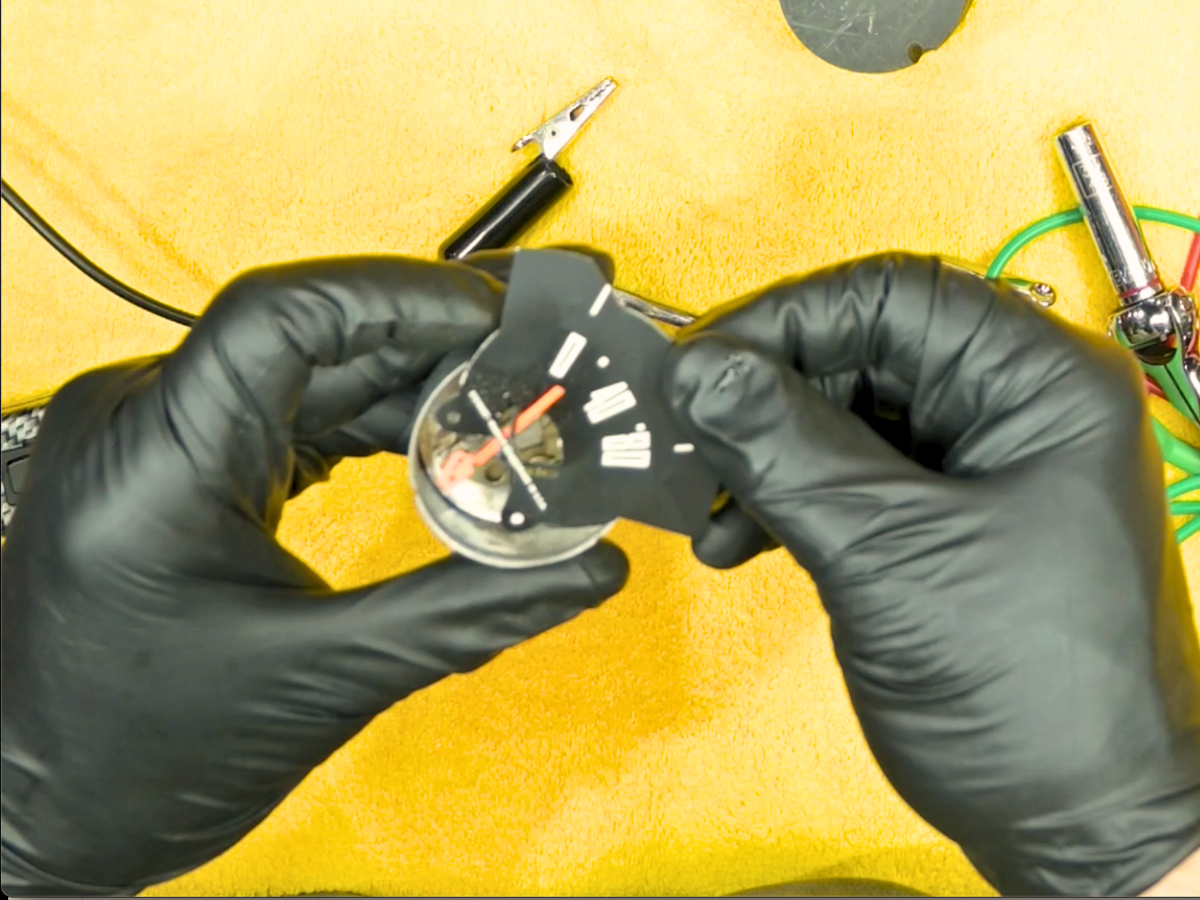
1) Remove the Original Faceplate (Without Damage)
Work slowly around the perimeter rather than trying to pop the face off in one shot. Use the 90° pick to gently lift the crimped edge a little at a time, then follow with the micro pry bar to finish each section. Keep a fingertip on the face as it releases so it doesn’t spring up and clip the needle.
If you introduce a small kink, lay the plate flat and ease it out with a broad, flat tool, pressing near the base rather than the tip to avoid new marks.
2) Install the Fuel Face (or Overlay)
Align the center hub and index slots, then seat the plate evenly. Tighten fasteners alternately so you don’t twist the face. Confirm the location pins are engaged and that the face sits flush all the way around; a slight rub here can cause sticky needle behavior later.
3) Bench-Test Wiring Layout
• Grounds: Tie grounds together for both the Power Probe and the potentiometer.
• Power (12 V): To the top-right post of the temperature gauge (board regulator feed in this setup).
• Signal to Fuel Gauge: From the potentiometer lead to the fuel-gauge input (pin #7, third down).
Always verify pin positions with your own cheat sheet; cluster variations exist, and a wrong pin will throw you off.
4) First Power-Up (Expect Slightly Low Reading)
Set your multimeter to ohms and dial the potentiometer around 23 Ω. Power the board and watch the needle. With an oil gauge wearing a fuel face, most units sit just below half at this point. That’s normal pre-calibration behavior and confirms the conversion is working.
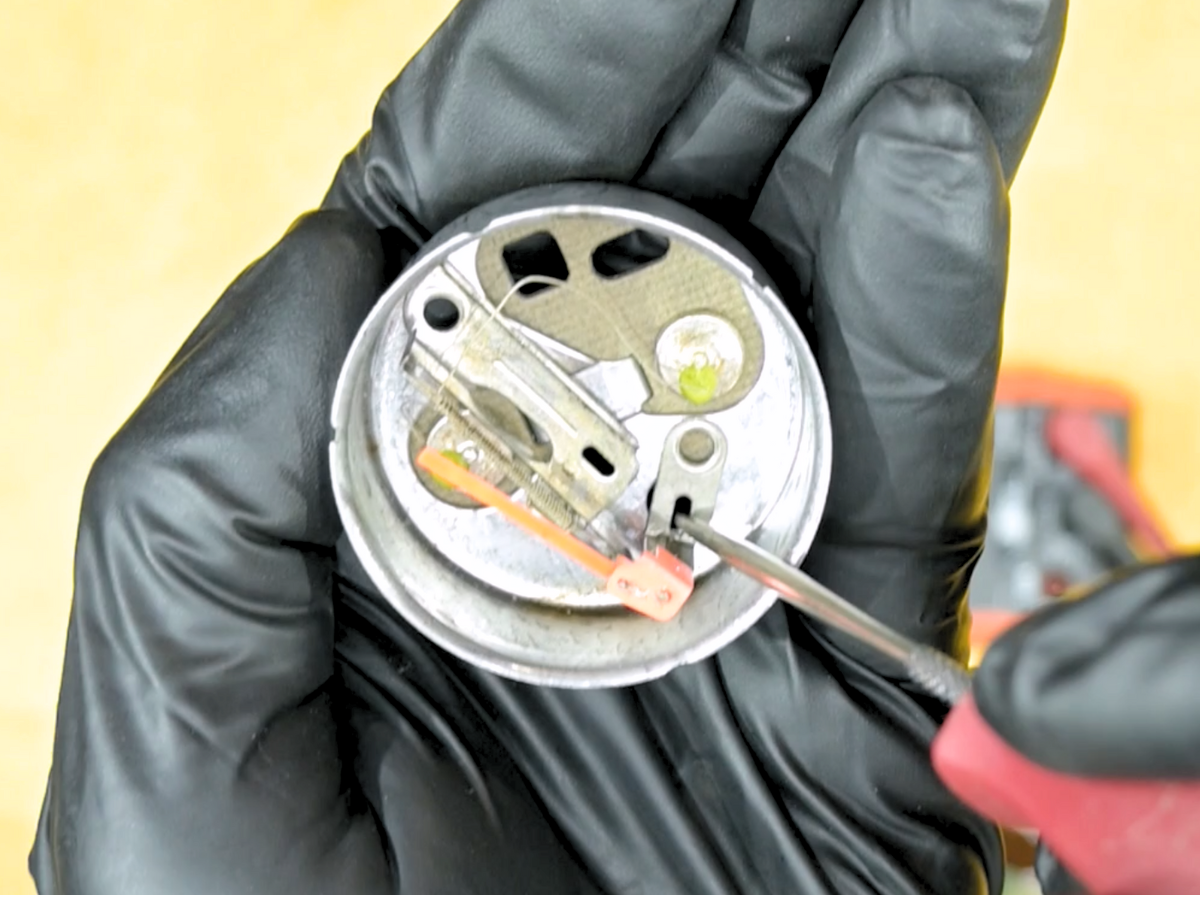
5) Calibrate to Read Correctly at 23 Ω (½ Tank)
Inside the gauge are two small tabs accessed through keyhole openings and tied to two pivot arms. Make tiny adjustments: pull the bottom tab slightly and push the top tab slightly (use your pick as a miniature pry bar while bracing a finger on the gauge body—never on the wires). Reassemble lightly, set the pot back to ~23 Ω, and re-check. Repeat micro-moves until the needle rests exactly at ½. Keep test leads from touching adjacent metal, or your readings will wander.
Watch our Fuel Gauge Fix for 1973-1985 Full Size Jeeps:
Common Results
If you only swap the face and skip calibration, 23 Ω typically reads a hair under ½. You can 100% run with this. By taking additional calibration steps as laid out in the video, 23 Ω lands at exactly ½.